
Picture a small retail chain that wants its website and phone app to read store hours from one place. A tiny API solves that, and you can have one running in about ten minutes.
In this tutorial, we’ll install FastAPI inside a virtual environment using pip install "fastapi[standard]", then build that store-hours API. I ran every command below on Windows with Python 3.12.5 and FastAPI 0.162.2.
Here’s what we’re building: an API with its own interactive documentation page.

Before You Start: What You Need to Install FastAPI
You need Python 3.10 or newer, since that’s the minimum the current FastAPI release accepts on PyPI. Check yours with python --version. If you juggle several interpreters, installing multiple Python versions explains how to pick one.
Our running sample is three stores, kept in a plain dictionary so a database doesn’t get in the way:
| Key | City | Opens | Closes |
|---|---|---|---|
| austin | Austin, TX | 8:00 AM | 9:00 PM |
| denver | Denver, CO | 9:00 AM | 8:00 PM |
| boston | Boston, MA | 7:30 AM | 6:00 PM |
Step 1: Create a Virtual Environment
A virtual environment is a private folder of packages for one project, so this install can’t break anything else. If you’re still deciding what to build with Python, this setup fits most projects. Open Command Prompt and run these one at a time:
- Make the project folder with
mkdir store-api, thencd store-api. - Create the environment with
python -m venv .venv. - Activate it with
.venv\Scripts\activate.
mkdir store-api
cd store-api
python -m venv .venv
.venv\Scripts\activate
Other shells use a different activation line. On macOS, use python3 if python isn’t found:
| Shell | Activate command |
|---|---|
| Windows Command Prompt | .venv\Scripts\activate |
| Windows PowerShell | .venv\Scripts\Activate.ps1 |
| macOS / Linux | source .venv/bin/activate |
# macOS / Linux
mkdir store-api && cd store-api
python3 -m venv .venv
source .venv/bin/activate
Checkpoint: your prompt now starts with (.venv).
Step 2: Run pip install “fastapi[standard]”
With the environment active, install FastAPI plus its standard extras. Keep the quotes, because some shells treat square brackets as a pattern:
pip install "fastapi[standard]"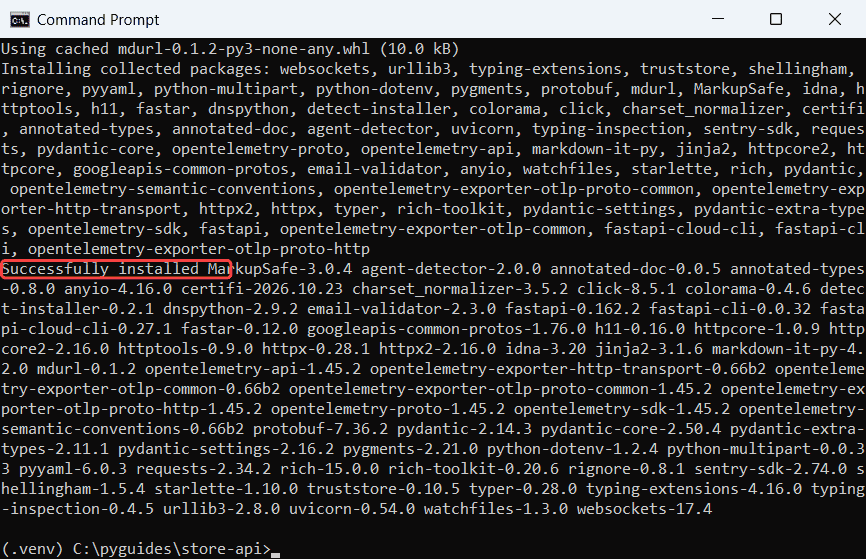
Checkpoint: pip ends with Successfully installed. That one line added 59 packages, including the fastapi command and the Uvicorn server. For a fixed release later, pin a specific version with pip.
Step 3: Verify the FastAPI Version
Before writing code, confirm that the install landed in the right place. Two quick commands cover it:
fastapi --version
python -c "import fastapi; print(fastapi.__version__)"
FastAPI CLI version: 0.0.32
FastAPI Cloud CLI version: 0.27.1

0.162.2
Checkpoint: you see version 0.162.2, or a newer one.
Step 4: Write Your First API in main.py
Create main.py in the store-api folder and paste this complete file. Each decorator maps a URL to a plain function, and {city} becomes the function’s city argument:
from fastapi import FastAPI, HTTPException

app = FastAPI(title="Store Hours API")

STORE_HOURS = {
    "austin": {"city": "Austin, TX",
               "opens": "8:00 AM", "closes": "9:00 PM"},
    "denver": {"city": "Denver, CO",
               "opens": "9:00 AM", "closes": "8:00 PM"},
    "boston": {"city": "Boston, MA",
               "opens": "7:30 AM", "closes": "6:00 PM"},
}


@app.get("/")
def home():
    return {"message": "Store Hours API is running"}


@app.get("/hours/{city}")
def get_hours(city: str):
    store = STORE_HOURS.get(city.lower())
    if store is None:
        raise HTTPException(status_code=404, detail="No store in that city")
    return store
Whatever dictionary you return is sent as JSON. An unknown city raises HTTPException, which FastAPI turns into a 404 response. The capitals on STORE_HOURS follow the naming convention for Python constants.
Step 5: Start the Server with fastapi dev
In the same terminal, with (.venv) still showing, run the development server. Any editor works here, and PyCharm vs VS Code compares the two popular ones:
fastapi dev main.py
Server started at http://127.0.0.1:8000
Documentation at http://127.0.0.1:8000/docs
INFO:     Uvicorn running on http://127.0.0.1:8000 (Press CTRL+C to quit)
INFO:     Application startup complete.
Checkpoint: the terminal shows the server address and stays busy. That’s normal, so leave it running and press Ctrl+C only when you’re finished.
Step 6: Open Your Endpoint in the Browser
Go to http://127.0.0.1:8000/hours/austin in any browser:

Checkpoint: the page shows Austin, TX, opening at 8:00 AM and closing at 9:00 PM.
Step 7: Open /docs and Try the Endpoint
FastAPI generates a Swagger UI page from your code. Open http://127.0.0.1:8000/docs, then:
- Click GET /hours/{city} to expand it.
- Click Try it out.
- Type
austinin the city box. - Click Execute.

Checkpoint: Code reads 200 and the response body matches what the browser showed.
Test the Store Hours API
Let’s prove the edge cases too. This script uses httpx, which the standard extras installed. Run it from a second terminal while the server keeps going: