
You pull data from an API, and suddenly your object has arrays inside arrays of objects. You try to type it quickly, but things break. Autocomplete stops working, and errors show up in unexpected places.
This is where TypeScript interfaces with nested arrays of objects become essential. They help you define structure clearly so your code stays predictable and safe, especially in real-world cases like API responses or form data.
In this article, I’ll show you 4 ways to declare and use TypeScript interfaces with nested arrays of objects.
Method 1 – Basic Nested Interface Structure
Use this when your data structure is fixed and predictable, like API responses.
Step 1: Define Child Interface
interface Task {
  id: number;
  title: string;
  completed: boolean;
}
How does this code work?
You define a Task interface that represents each object inside the array.
Step 2: Define Parent Interface with Array
interface Project {
  name: string;
  tasks: Task[];
}
How does this code work?
The tasks property is typed as Task[], meaning an array of Task objects.
Step 3: Use the Interface
const project: Project = {
  name: "Website Redesign",
  tasks: [
    { id: 1, title: "Design UI", completed: false },
    { id: 2, title: "Build Components", completed: true }
  ]
};

console.log(project.tasks[0].title);
Expected Output:
Design UI
I executed the above example code and added the screenshot below.

How does this code work?
TypeScript enforces that every item inside tasks matches the Task interface.
Pro Tip: Always extract nested objects into separate interfaces instead of inline typing. It improves readability and reuse.
Method 2 – Inline Nested Object Interfaces
Use this when the structure is small and not reused elsewhere.
Step 1: Declare an Interface with an Inline Array Object
interface Project {
  name: string;
  tasks: {
    id: number;
    title: string;
    completed: boolean;
  }[];
}
How does this code work?
Instead of creating a separate interface, you define the object structure directly inside the array.
Step 2: Use the Interface
const project: Project = {
  name: "Mobile App",
  tasks: [
    { id: 1, title: "Setup project", completed: true }
  ]
};
How does this code work?
TypeScript still enforces structure, but the type is not reusable.
Pro Tip: Avoid inline types for large structures. They become hard to maintain quickly.
Method 3 – Use Type Aliases with Interfaces
Use this when you want flexibility, especially with unions or advanced types.
Step 1: Create a Type Alias for Nested Object
type Task = {
  id: number;
  title: string;
  completed: boolean;
};
Step 2: Use It Inside an Interface
interface Project {
  name: string;
  tasks: Task[];
}
Step 3: Extend with Union Types
type TaskStatus = "pending" | "done";

type Task = {
  id: number;
  title: string;
  status: TaskStatus;
};
How does this code work?
A type alias lets you create unions like “pending” | “done”, which interfaces cannot do directly.
Step 4: Use in Data
const project: Project = {
  name: "Dashboard",
  tasks: [
    { id: 1, title: "API Integration", status: "pending" }
  ]
};
How does this code work?
TypeScript restricts status to only allowed values, improving type safety.
Pro Tip: Use type aliases when you need unions, intersections, or TypeScript mapped types.
Method 4 – Nested Arrays with Generics
Use this when you want reusable and scalable interfaces.
Step 1: Create a Generic Interface
interface ApiResponse<T> {
  data: T[];
  success: boolean;
}
How does this code work?
The <T> is a generic type placeholder. It lets you reuse this interface with different data types.
Step 2: Define Your Nested Object
interface Task {
  id: number;
  title: string;
}
Step 3: Use Generic with Nested Array
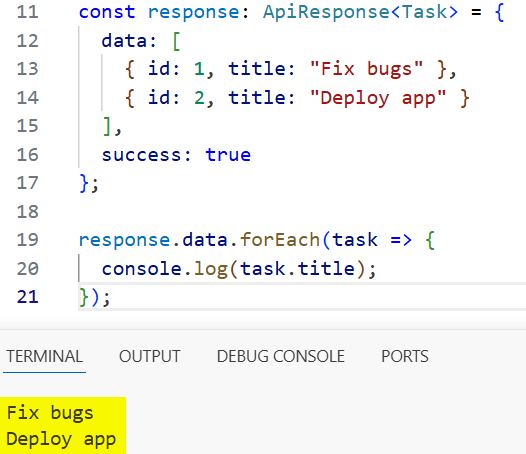
const response: ApiResponse<Task> = {
  data: [
    { id: 1, title: "Fix bugs" },
    { id: 2, title: "Deploy app" }
  ],
  success: true
};
How does this code work?
You pass Task into ApiResponse, making data a TypeScript array of Task objects.
Step 4: Access Nested Data
response.data.forEach(task => {
  console.log(task.title);
});
Expected Output:
Fix bugs
Deploy app
I executed the above example code and added the screenshot below.
How does this code work?
TypeScript knows each item in data is a Task, so you get full autocomplete and validation.
Pro Tip: Generics are powerful when working with TypeScript APIs, especially in reusable services or utility functions.
Things to Keep in Mind
- Avoid using any: Using any disables type safety and defeats the purpose of TypeScript.
- Use optional properties carefully: Mark properties with ? only when they may be missing; otherwise, enforce strict structure.
- Enable strict mode: Turn on strict in tsconfig to catch null and undefined issues early.
- Prefer interfaces for structure: Use interfaces for object shapes and types for advanced patterns like unions.
- Watch nested depth: Deeply nested arrays can reduce readability; break them into smaller interfaces.
- Use readonly when needed: Add readonly to prevent accidental mutation of nested data.
You learned four practical ways to declare and use TypeScript interfaces with nested arrays of objects.
Use basic interfaces for clarity, inline types for small cases, type aliases for flexibility, and generics for reusable patterns.
You may read:
- How to Check the Type of a Variable in TypeScript?
- How to Set Default Values for TypeScript Types?
- Define and Use TypeScript Interface Array of Objects
- How to Use TypeScript Interface Function Properties?

Bijay Kumar is a 13-time Microsoft MVP with more than 18 years in software development, and the founder of Python Guides and TSinfo Technologies. He started out building .NET and SharePoint solutions at HP, TCS and KPIT before moving into Python, machine learning and AI, and he also builds web apps with TypeScript and React. He writes the tutorials here himself, and every example is run before publishing so you see the real output. More about Bijay · Microsoft MVP profile · LinkedIn